

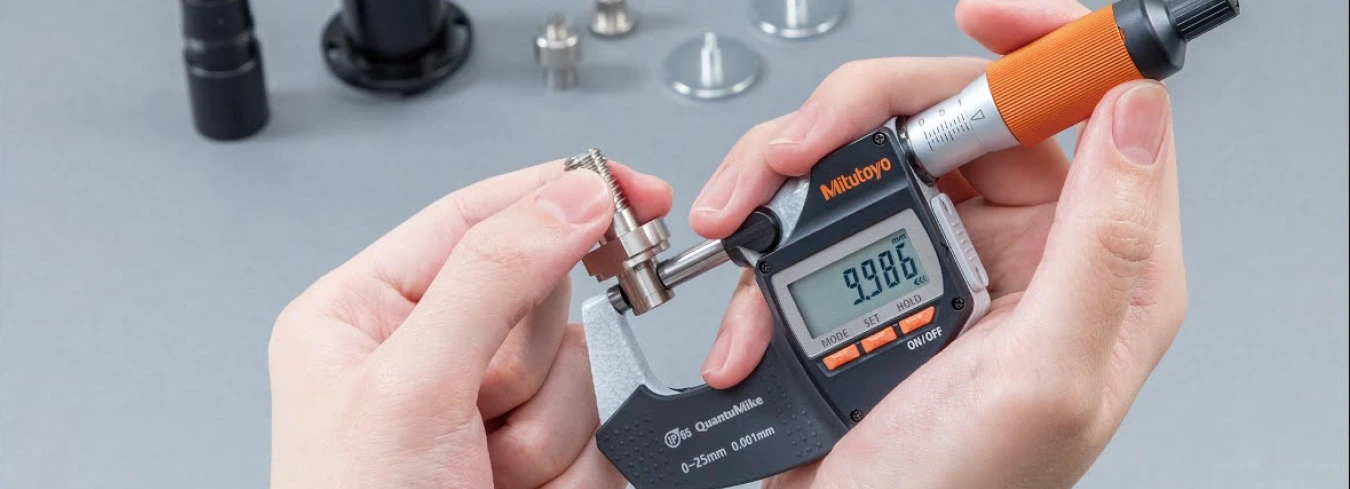
Direct Answer: To use a Mitutoyo micrometer correctly, clean the faces, check the zero and close the spindle with the ratchet or friction thimble. Then read the sleeve, then the thimble, and repeat critical readings.
Two operators, one micrometer, two different readings: technique is usually why.
If you are buying from an authorised Mitutoyo dealer in the UAE, you are not just buying a measuring tool. You are buying confidence that your measurements are repeatable across operators, shifts and batches.
A Mitutoyo micrometer can deliver excellent accuracy, but only with the correct measuring force, clean contact faces and a proper zero check. This guide shows the workflow machinists and QC teams follow, plus what to ask your supplier before you buy.
Why Mitutoyo Micrometers Give Better Results When Used Correctly
Most measurement errors are caused by technique, not the micrometer. Consistent measuring force is controlled with a constant-force device such as a ratchet or friction thimble.
If you tighten by feel without the ratchet, two operators can measure the same part and record different values. The micrometer is precise, but the force is not consistent.
What to Check Before Measuring
Do these three checks every time you start a measurement session.
Clean the Measuring Faces
Dust, oil or a tiny metal chip between the anvil and spindle can create false readings. Clean the measuring faces and check the zero before measuring, as the instrument’s manual advises.
Bring the Tool and Part to a Stable Temperature
Micrometers and parts expand with heat. If the part is warm from machining, let it stabilise before the final measurement, especially for tight tolerances.
Confirm the Zero Point
Check the zero point before you start. The Zero Check section below covers how to do it and what to do if the zero is off.
Step by Step: How to Use a Mitutoyo Outside Micrometer Properly
This workflow applies to most mechanical and digital outside micrometers.
Step 1: Hold the Micrometer Correctly
Hold the frame with a stable grip. Avoid squeezing too hard, because hand heat can influence precision on tight work.
Step 2: Position the Part Squarely
Place the part between the anvil and spindle so the faces contact squarely, not at an angle. Angled contact creates measurement error.
Step 3: Close Using the Ratchet or Friction Thimble
Turn the thimble until close, then use the ratchet to apply consistent measuring force. Always use the ratchet stop or friction thimble for the final turn, so the force stays consistent.
Step 4: Take the Reading
- Mechanical micrometer: read the sleeve first, then the thimble, then add the vernier if present. A worked example follows below.
- Digital micrometer: confirm the units and resolution, then record the stable reading.
Step 5: Repeat for Confidence
For critical parts, measure the same feature two or three times, slightly repositioning the part, and confirm repeatability.
How to Read a Mechanical Micrometer (0.01 mm Graduation)
- Sleeve (barrel): read the whole millimetres visible on the sleeve. Add 0.5 mm if the half-millimetre line below the datum line is also visible.
- Thimble: read the thimble line that lines up with the datum line on the sleeve. Each line is 0.01 mm.
- Add them together. For example, if the sleeve shows 12 mm and the half-millimetre line is visible, that is 12.5 mm. A thimble reading of 37 adds 0.37 mm, so the measurement is 12.87 mm.
- Vernier (if fitted): read the vernier line that aligns with a thimble line, and add it as the next decimal place (0.001 mm).
Quick Reference Table: Perfect Measurement Checklist
Use this table as a quick check before every measurement.
| Stage | What to do | Why it matters |
|---|---|---|
| Before measuring | Clean faces and part | Prevents false readings from debris |
| Force control | Use ratchet or friction thimble | Consistent measuring force improves repeatability |
| Zero check | Verify the zero point routinely | Catches drift and handling errors early |
| Reading | Read in order, from sleeve to vernier | Avoids reading mistakes |
| Verification | Re-measure and confirm repeatability | Detects set-up or alignment issues |
Range and resolution decided? Send them over
Send the range and resolution you need, along with your shop conditions, and we will recommend a suitable Mitutoyo micrometer.
Digital Micrometers: Setting Units, Zero and Hold
Digital models follow the same technique, with a few extra controls:
- Units: set millimetres or inches, and check the resolution on the display.
- Zero or origin: close the faces with the ratchet and press the zero or origin button, as described in the manual for your model.
- Hold function: many models can hold a reading when the micrometer is removed from the part.
- Locked keys: if a button does not respond, check the manual for the model’s lock or key function, because the steps differ between models.
- Batteries: replace weak batteries, because a low battery can cause an unstable display.
Zero Check and Adjustment Basics
To check the zero, bring the faces into contact and use the ratchet stop with a controlled action. If the zero is off, follow the adjustment steps in your micrometer’s manual. On many mechanical models, a small spanner supplied with the instrument rotates the sleeve.
Practical tip: if the zero keeps drifting, do not keep adjusting. Clean the faces again, inspect them for damage, and have the micrometer checked or calibrated.
Common Mistakes That Ruin Micrometer Accuracy
- Not using the ratchet stop and tightening by feel.
- Measuring a warm part right off the machine.
- Measuring at a slight angle instead of square contact.
- Dirty faces or an oily film on the part.
- Trusting one reading on a critical dimension instead of confirming repeatability.
Care and Storage
Wipe the faces after use. When storing, leave the faces slightly apart rather than clamped together.
Keep the micrometer in its case, away from dust, coolant and shocks.
Buying Note: Choosing the Right Mitutoyo Micrometer
Even the best technique fails if the tool specification is wrong. When purchasing, confirm:
- Measuring range: 0 to 25 mm, 25 to 50 mm and so on.
- Resolution needed: a common digital resolution is 0.001 mm for many models.
- Constant-force mechanism: ratchet stop or friction thimble.
- Environment: coolant-proof models for harsh shop floors.
For a wider comparison of tools, read our guide on how to choose measuring tools.
Conclusion: Technique Makes the Micrometer Accurate
Mitutoyo micrometers are built for precision, but perfect measurements come from discipline. Clean faces, controlled measuring force, regular zero checks and repeatability verification give consistent results across every operator.
Tell us the sizes you measure and whether your shop uses coolant, and we will recommend the right Mitutoyo micrometer. You can also chat with us on WhatsApp at +971 50 684 6500.
Browse the Mitutoyo range or message us
See the Mitutoyo instruments we supply, or send your range, resolution and shop conditions for a customised quote within 24 hours.
Frequently Asked Questions
How tight should I close a Mitutoyo micrometer?
Use the ratchet stop or friction thimble and let it apply the measuring force consistently. Do not tighten by feel.
How do I do a zero check on a Mitutoyo micrometer?
Bring the faces into contact carefully, use a controlled ratchet action and confirm the zero point. If it is off, follow the adjustment steps in the manual.
How do I read a Mitutoyo micrometer?
Read the whole millimetres on the sleeve, add 0.5 mm if the half-millimetre line shows, then add the thimble reading at 0.01 mm per line. Add the vernier reading if one is fitted.
Why do two people get different micrometer readings?
Most commonly because of inconsistent measuring force, dirty faces or a slight angle. A constant-force device such as a ratchet reduces operator variation.
What is the difference between a ratchet stop and a friction thimble?
Both turn the spindle against a slip mechanism that limits the measuring force, which is why they give repeatable results.
How do I set or unlock a Mitutoyo digital micrometer?
The steps differ between models, so check the manual for your model’s zero, origin and key-lock functions. Replace weak batteries if the display is unstable.
Where can I buy Mitutoyo micrometers in the UAE?
Al Rizq is an authorised Mitutoyo dealer in the UAE. See our Mitutoyo page, or send us the range and resolution you need for a quote within 24 hours.
Do I need calibration if I buy a new micrometer?
For quality-critical work, yes. Ask what documents come with the micrometer, such as a calibration certificate, and about recalibration, especially if your work requires traceability. Ask us before you order.